Saturday, November 17, 2012

Um... Oops

I was just going over my pins looking for inspiration for this fabric I bought yesterday and saw that I pinned this shirt a while ago!
Source

I didn't even remember I pinned it! Can you see how similar it looks to my recent shirt?


I can't believe I copied a shirt without even consciously doing it!
I guess we can call it subconscious copycatting!
WEIRD.
I have no idea where my head is these days.

In other news, things aren't much better here. It's been quiet for the last few hours, but we haven't left the house that much in days. I had to drive out today for some errands and I was stressed out the whole time because if the sirens go off while you're driving you need to stop at the side of the road, lie on the ground and cover your head. And while you do that, you can see the rockets flying and being intercepted over your head (or at least this is what a friend told me happened to her). You can see why I wasn't keen on that happening. Not to mention I'd feel really silly lying on the ground with my face in the sand for ten minutes.

Well, I just saw the picture of the shirt and had to share!
Have you ever been subconsciously inspired?

Wednesday, November 14, 2012

In which I strip. Well, use a (bias) strip.

Hey everyone,
I don't know if you guys know of this, or are following the news about the middle east, but the IDF killed a top Hamas commander today. We've been under rocket fire for a very long time now (I live in the south of Israel) but I feel like this is going to make it much worse. The news is talking of Israeli forces being gathered in the Gaza Strip border (which may mean war) and the Hamas are threatening with strong retaliation. I just heard on the news that at least 70 rockets have fallen in the last 4 hours, some of them very close to my home town. It feels pretty terrible waking up in the middle of the night to sirens and being afraid for the life of your friends and family all the time. It's surreal that we've lived in this situation for so long and that it's getting even worse, and we're still managing to live our lives. I've lived through quite a few wars here in Israel and I keep being overwhelmed with the idea that this is my reality.
I don't mean this to be a political statement, I don't think this is the right platform to talk of these things, I just thought of sharing my private feelings and how it feels to be just a normal citizen in an extraordinary situation like this.

Anyway, moving on to lighter and more blog appropriate things -
I've made a new shirt! I actually wore this shirt to my first day of work! It was really exciting!

bias strip shirt, bias strip sleeve, satin fabric, satin shirt, satin bias strips.

I took my own advice (and Modcloth's) and used bias binding as an embellishment. I quite like the effect! Making the bias tape wasn't as tedious as I thought it would be as the bias pieces are pretty short. A tip from me to you while making bias strips from a slippery fabric - LOAD UP ON THE STARCH! I starched the bejeezuz out of the bias strips, it was the only way to make them stable enough to actually iron them. I made the starch myself by mixing a glass of hot water and three table spoons of starch and letting is cool to room temperature.

bias strip shirt, bias strip sleeve, satin fabric, satin shirt, satin bias strips.

I made this with the remnants of the Cinderella Dress. Can you believe I had this much left?? I had enough to make another half of a shirt, which I did and will show you soon!
It's really slinky and feels great to wear, the only thing is that every little drop of water CREATES A HUGE WATER STAIN. After five minutes at work I managed to spray myself with water from the sink in the bathroom and almost cried. I hate hard to manage fabrics, I don't know why I'm so attracted to them and I never think of how problamatic they are when I do my fabric shopping, it's like I'm a child, I can't think ahead.

(How impressive is my Jesus picture? Let us all imagine this is what I looked like when I figured out how to make these sleeves: (with a bunch of white cloak clad angels singing "Ahhhhhhh" in the background))


bias strip shirt, bias strip sleeve, satin fabric, satin shirt, satin bias strips.

After thinking about it for a few minutes I  managed to figure out how to attach everything to everything without leaving raw edges. I just LOVE figuring stuff out! The bias strips are still a little stiff from the STARCH which makes the sleeve look a little wonky but other than that I LOVE the way it turned out!

bias strip shirt, bias strip sleeve, satin fabric, satin shirt, satin bias strips.

While trying this shirt on in one of my many fit-checks (do you guys to this too? I feel like a third of the time I spend sewing I'm trying on stuff) I decided the shirt looks too blank, after much thought I decided to make a little bow and attach it to the front of the neckline. As you can tell I changed me mind since then (apparently even if I do a lot of thinking I can never make up my mind) and opted to attach it on the left side... I think it's cuter this way! I managed to make the cutest little bow in the world, it perfectly proportioned (have you noticed how difficult it is to achieve the perfect proportion between the bow and the band in the middle?). see?

bias strip shirt, bias strip sleeve, satin fabric, satin shirt, satin bias strips.

HEEEEEEEEEEEEEEEEEEEEEEEEEE

bias strip shirt, bias strip sleeve, satin fabric, satin shirt, satin bias strips.

I created a curved hem for both the front and the back - I think it's such a flattering silhouette! Especially in the back, it gives your but a but-lift! who doesn't want that?
I finished the sleeves and the neckline and sleeves with bias strips and serged the bottom of the shirt and hemmed it without bothering too much with it.

What do you guys think? Let me know if you have any question about making the sleeves or anything about the blouse!
Also, I'd be happy to answer question about my first paragraph, but please express yourself in a respectful way, I'm sure you don't all agree with whatever is going on, but this isn't the place to express your thought if you don't, unless you really want to ask honest questions, which I'd be happy to answer.

Thanks for reading! I hope you're having a good week!

Saturday, November 10, 2012

Skirt Embellishment

As I told you guys in my last post, I feel like there's something missing in my Mystery Pocket Skirt. It's a little too.... navy. A reader suggested I top-stitch some of the seams of the skirt, but I'm so AFRAID of top-stitching! I always worry that after putting so much effort into a garment I'll ruin it with my bad top-stitching. Do you ever feel like this? You feel that's something's missing but don't want to over do it at the same time.

I thought about adding gold buttons at the top and bottom of the slits, but am still unsure if I like the look. This is where you guys come in! what do you think?


What do you think? ( I know the buttons are kind of awry, I couldn't get them to sit straight because of the shanks!)

Also, I thought of a fun idea if I ever decide on making this skirt again, it'll be really cool to make the back of the pocket in a contrasting color so that it'll pop just through the slit.. what do you think?

Monday, November 5, 2012

Copy Cat Mystery Pocket Skirt

I've been a little less creative with my last few projects (evidence here), which is why I have no shame in calling myself a copycat. I LOVE looking at a garment (especially more intricate vintage garments) and figuring out how to recreate them myself. Even though it's not my original idea (though I do try to add my own twist to it and not outright copy it) I feel so proud of myself for going through the whole process of drafting and sewing the garment from start to finish.

My all new copycat garment comes from Suzannah's Adventures in Dressmaking. Suzannah holds a Sewing Circle, where readers send her questions and she answers them (very thoroughly I might add!) while asking other readers for their opinion and input. How cool is that?
Anyway, in Suzannah's last sewing circle (for the full post click here) a reader asked for advice on making the following skirt:


To be quite honest, I didn't much like the skirt in the beginning. I have a issue with A line skirts, I feel like the don't do much for my body, but after inspecting the skirt I realized that the fact that it grazes the hip right before it flares out (rather than being much wider than the hips) may be quite flattering.
Most of the talk in the post was about the unique pockets, which upon seeing them immidiatly got me thinking of how to recreate them. I was so excited for the challenge! OK, I admit, this was the reason I made this skirt. I cannot admit defeat, even if it's over a skirt I don't really like in the first place.

Stay tuned for a joined tutorial Suzannah and I will post tomorrow on how to draft and sew this skirt! (link to the tutorial here)

This is my version!
I have a few issues which I will share with you along the showing of the pictures.
I tried to imitate the original outfit, so I wore a chiffon shirt, which I though was a good enough effort. what say you?


What do you think of the pockets? they look the same right? huh? huh? huh?
I love how they turned out! they're not very functional, as putting something in them kind of distorts the whole look. it's not very pleasant, but who care about functionality?


This is kind of a weird shot of the back, but it's the only one I have. I admit there's not much to see, but lets all appreciate my invisible zipper for a second.


OK.
I think I can officially say that I love invisible zippers. they are SO much better than regular zippers. there, I said it. they're better. I feel like regular zippers are so much more work, no? I may have forgotten how to sew a regular zipper. does that make me a terrible sewer?


One of the issues I have with this skirt it that I stupidly decided not to line it (out of pure laziness. I hate myself sometimes) and I think it lacks the sturdiness of the original skirt. I think I'm going to line it, but I have to rip some seams which I am not looking forward too.

Another issue is that because I made this skirt in navy, it kind of reminds me of school girl skirt... I kind of like the idea and don't at the same time. I thought of adding gold buttons above and below the slits of the pockets... what do you guys think?

Don't forget to check in tomorrow in for our tutorial!
update: here's the link to the tutorial 

Tutorial for Mystery Pocket Skirt

As I said yesterday, Suzannah of Adventures in Dressmaking and I are doing a joined tutorial on the mystery skirt she discussed previously in her sewing circle. I'm pretty impressed with how similar it came out (if I do say so myself). Part I of the tutorial will be featured here - the pattern drafting part. Part II - the sewing part is featured on Suzannah's blog, so don't forget to check it out one you're done with Part I!
This is my version of the skirt! (for more pictures of the skirt you can check out my full post about it here)


Let's compare it to the original skirt:


When I draft a pattern, I look at the basic qualities of a skirt in order to assess what my basic pattern will be and what I have to add to it. So, let's take a look at the skirt:
1) the silhouette: The skirt is an A line skirt with a waistband and seam in the center front. The dress is high waisted and form fitting.
2) the pockets: the pocket look like they are part of the panel of the skirt rather than a patch pocket. The pocket consists of a slit and a square pocket sack in the inside of the skirt (which I saw through the fabric in one of the close up pictures)
3) Fabric: The fabric seems quite sturdy and doesn't really drape, thick cotton? cotton sateen? wool?


General Thoughts:
1) I decided to really make the pockets part of the panel of the skirt rather than a patch pocket, BUT I will add instructions throughout the tutorial so that you can make the patch pocket version if you like. The patch pockets are much easier if you ask me, but they don't achieve exactly the same look as the require to stitching and have a little more bulk. You're welcome to chose which ever way you like!
2) lining - I chose not to line my skirt, I don't really like to line my skirts but in retrospect I kind or regret this decision and I may add a lining anyway. You may want to line your skirt as it will add more structure to it (as the original skirt has) and the inside of the pocket isn't the prettiest so you may want to hide that as well. I'll add instructions for lining as well throughout the tutorial.

This tutorial will include the following segments:
How to draft a form fitting A line skirt
How to draft a built in slit pocket/ patch slit pocket.
How to sew an inverted corner.
And of course how to draft and sew the whole skirt!

Lets get on with in!


These are your basic materials for drafting the pattern, you will also need pattern paper. The french curve isn't a must have but it does help drawing.. well, curves.


1) First, Measure your waist and divide by 4 (you should probably add between 1\4 to 1\2 an inch ease to this measurement unless you like your skirt to fir very very tightly). Mark this measurement on you pattern paper.


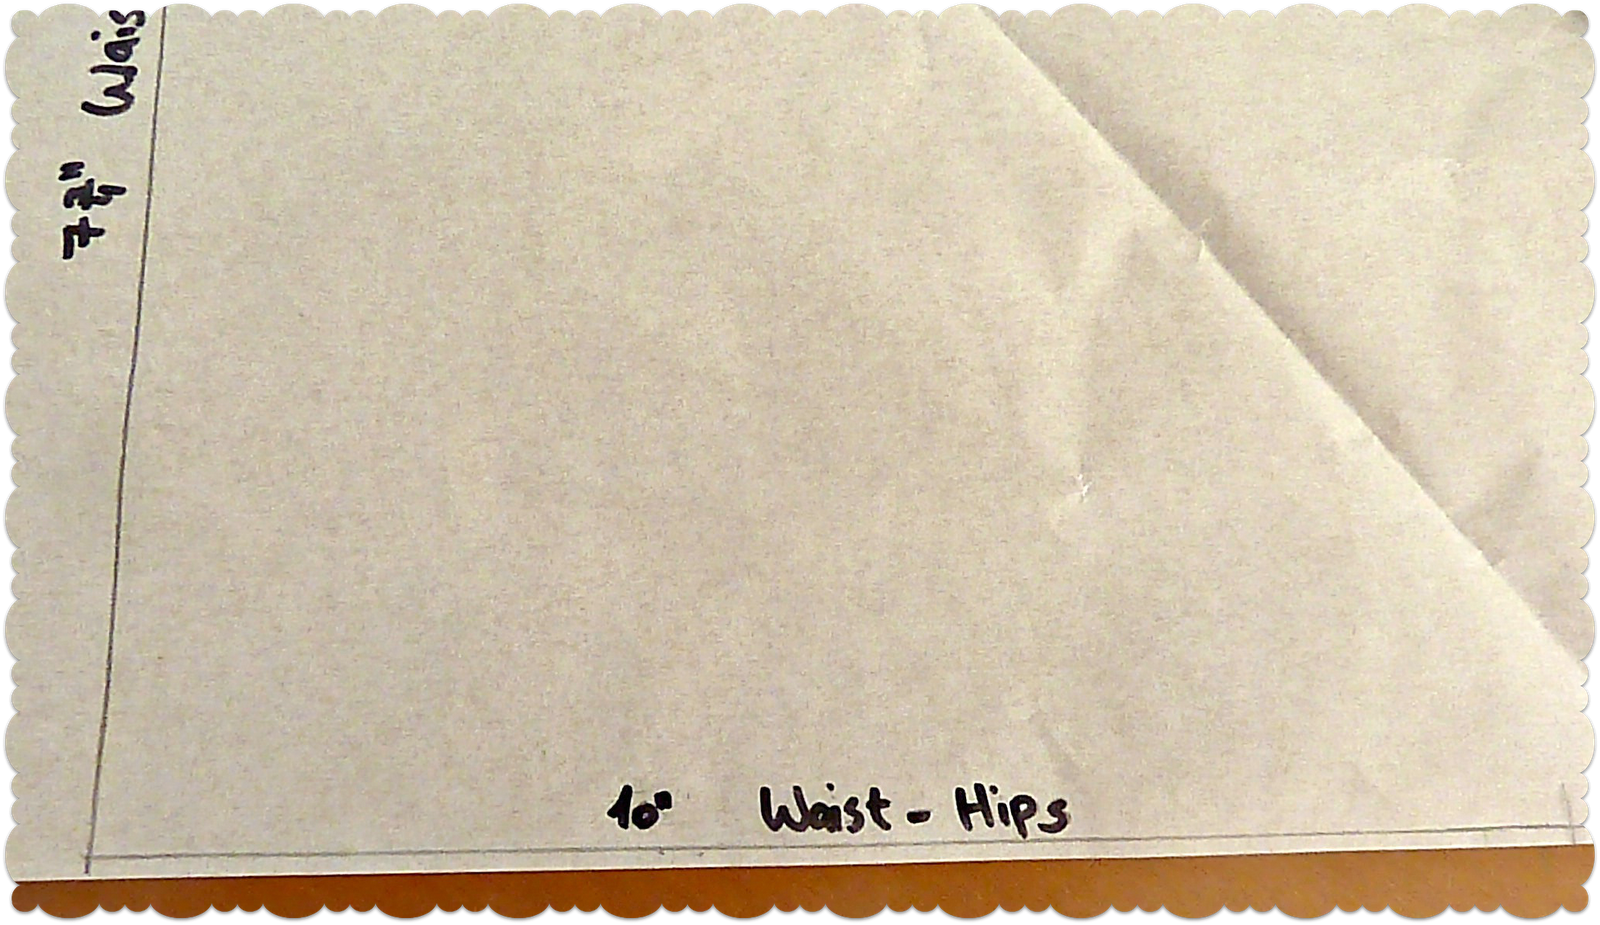
2) Next, measure the distance between your waist and your hips (the widest part of your butt). Mark this at a right angle to your waist measurement.


  3) Measure how long you want your skirt to be down from the waist and mark it down on the same line you marked the wait hip measurement (it will obviously longer. well, hopefully) and square the whole thing (meaning two sides will be as wide as your waist and two  sides will be as long as your skirt will be).


cut this square out.


Devide your rectangle into three equal pieces.


Slash on the lines that you mark, BUT DON'T CUT THE WHOLE WAY.


  See? I left a little tiny bit of paper in the end.


Now we're going to take a new sheet of pattern paper and mark our Hip-Waist measurement we measured before.

 Match up the rectangle we slashed and the measurement we marked on the paper (they should both have waist-hip measurements marked on them.


Tape that whole slashed part down, we don't want that one moving!


  measure around your Hip and divide that by 4. Mark this measurements at a 90 degree angle from your waist-hip measurement at the Hip Level.


Spread the slashed rectangle across the Hip Line.


Spread out the slashed rectangles so that the edge of the right slashed rectangle lines up with the end of the hip measurement. The Middle rectangle should be in.. well, the middle. Tape everything down!


Trace the bottom curve.


 Trace the upper curve.


Trace around the whole thing!


Cut the traced pattern out. Notice I marked the pattern with center- this is the side of the rectangle we taped down first - the side that doesn't flare out. This will be our Center Seam for the back and front.


Next we're going to draft the waistband. Mark a line an inch and a half down (or however wide you'd like your waistband to be) that follow the curve of the top of the pattern.

Cut along the line


We now have the pattern for the back skirt and the waistband!


Retrace your back pattern. we're going to make a front pattern out of this. (this is the back pattern without the waistband)
 Mark 2'' down and then 10'' down on the side seam of the pattern.


Measure 4'' and 7.5'' out and trace the trapeze we created.


Trace a round corner using your french curve (or your eyes) creating the rounded top of the pocket.


Measure up 3/4 inch from the bottom line of our trapeze. Mark a line up to this point. This will be the bottom of the pocket.

Mark a line 2'' away from out 10'' line and perpendicular to it. Then mark two points, one 2'' from the top and one 3'' from the bottom on the line we just drew.


Now we'e going to draft the pocket slit. in those points that we just marked, we going to create w 1/2 inch by 5'' rectangle. meaning, we're going to draw 1/2'' lines through each point and connect these line to create a rectangle.

Trace around our pocket and cut it out!
we now have all our pattern pieces! the pattern above is the front skirt and the pocket, and we already made the back pattern and the waistband in the first part of the tutorial.

For the sewing instructions check out Suzannah's Post!
Let me know if you have any questions!

Sunday, November 4, 2012

AHHHHHHHHHHH

For those of you with google reader you'll have noticed that I accidently published half of a tutorial that's not even done. I have no idea how I managed to click on the "publish" button. PLEASE IGNORE THE POST. I'll post the full post on Tuesday... (don't read it so it doesn't spoil it!)
SORRY!
I'M SUCH AN IDIOT!

Saturday, November 3, 2012

Chain Collar Blouse + Miniscule Tutorial

Hey everyone!
Forgive my radio silence! I just started a new day job and have yet to figure out how to organize my life, I hope to get it on track soon! In the mean time, I'll make it up to you with a few cool projects that I'm excited to show you!

This is another one of my Fall Looks that I am quite proud of and sad that I didn't make a version for myself! The pictures don't do this shirt justice (or to me really) as it was getting quite late when we took these and we were kind of in a rush. I edited them as much as possible (and when I say edited I mean changed the lighting and so on) but I still feel that they aren't as vibrant and heart warming as my pictures usually are (if I do say so myself).

I always put a lot of effort into taking project photos, I actually put on makeup and brush my hair. I've seen a lot of discussions about pictures vs reality when showing your projects off in your blog in blogosphere (catapulted by Anna), and thought I'd address the issue as well (while showing you terrible photos to unprove my point).  I LOVE taking the effort to take pretty pictures of my sewing projects, I sometimes take pictures of the projects in bulk (because I do wear heavier makeup while taking pictures than in real life) and I do time it to the right time of day and so on. I feel that if I put so much effort into making a garment, I should make the effort to showcase it beautifully just the same!
The reason I wear more makeup at photo-shoots (ha! photo-shoots.) is because it is a well known fact that make up doesn't show up in pictures, so you have to exaggerate all the elements of you make up to make them noticeable. I know of a lot of people that wear fake eyelashes to take photos because mascara doesn't show up very well in photos, I don't go that far as I don't like to have glue around my eyes. (and when I say a lot of people, I mean one, and it's a blogger I don't even remember the name of who wrote this a few years ago. 
About the outfits - Anna mentioned she doesn't wear heels in day to day life, eve though she does wear them in while taking photos. I have to admit a don't either. BUT I do wear heels quite often when I go out, so I do wear some of my garments that way. Also, I kind of think the point of having a blog is showing yourself in a certain way (in my case a makeup wearing heel strutting sewer) and to show the garments you made in the best way you can.
Anyway, my point is that even though I do alter my photos a bit (and again, it's usualy lighting and coloring) I do feel that I show my true self through these photos! even if they're not my everyday life, it's still me!

That being said, let's move on to the blouse!


 The lighting was so terrible I thought that if I gave it a vintage tint it will help matters! This reminds me of a picture I saw of a girl holding a garment and saying "maybe if I dye it black no one will be able to see all my mistakes". Well that's exactly what I'm doing. I'm one step above dying the picture black.

chain collar blouse, chain embellishment, button collar blouse

I made this blouse using this really soft and thick quilting cotton. It's SO nice to wear.
I opted for the same silhouette as all my other blouses, I can sew this pattern with my eyes close, I tell ya. I sewed so much trying to meet up this deadline that I probably did. Ha! that would be funny - SLEEP SEWING. What an efficient illness! I could make muslins, baste, do all my hand sewing and all the stuff I hate doing and not even remember it!

Ok, I'm so ashamed of my pictures I'll just post a close up of the collar and call it a day.

chain collar blouse, chain embellishment, button collar blouse

What do you guys think? I love this chain idea, I think it's such an elegant embellishment! It was pretty easy to do:
1) before sewing the collar to the shirt I made two vertical buttonholes (that match up with my buttons), I wanted them to end up exactly at the point of the collar so that the chain will really hang and be noticeable.
2) I cut two pieces of chain, one much larger than the other.
3) I chose two corresponding buttons (I opted for gold buttons so that it'll look like one piece). Note that your buttons must have a shank otherwise you can't connect the chains to them.
4) I then connected the two chains with a ring (one of those jewelery making rings) and connected that same ring to the the shank (do this for both sides)
5) sew the whole shirt together, and finish it with inserting the buttons to the buttons holes!
you're done!

Was that easy to understand? I didn't think to take pictures while I made it, which was silly of me, I know, but if I ever do this again (is it just me or is it incredibly difficult to buy chain? just basic not cheap looking chain. One of my friends suggested I buy a cheap necklace at forever 21 or some other store and just use that chain. interesting.) I'll post pictures.
are any of you going to attempt this?? have you ever tried to embellish a garment with chains? (we all know I have)

See y'all soon!
Related Posts Plugin for WordPress, Blogger...